Looking at the feedback from hundreds of travelers who’ve taken this journey north from Edinburgh, a few things become immediately clear: this tour delivers on its promise to show you some of Scotland’s most dramatic landscapes without requiring you to rent a car or navigate winding Highland roads yourself. The combination of stops—from the striking Kelpies sculptures to the shores of Loch Lomond to the historically significant Stirling Castle—gives you a genuine taste of both the natural beauty and human history that defines this region.
What really sets this experience apart is the quality of the guides. Travelers consistently mention their guides by name and with genuine enthusiasm. One visitor noted that their guide “told great stories and are very knowledgeable about the history,” while another described their driver as someone “who kept us laughing all day.” This isn’t just about getting from point A to point B; you’re traveling with someone who actually knows and cares about what they’re showing you.
The tour’s intimate scale deserves mention too. With a maximum of 16 travelers per coach, you’ll experience this as a small-group outing rather than a massive tour bus operation. This means you get actual attention from your guide and the chance to ask questions without shouting over dozens of other travelers.
One thing to keep in mind: this tour involves some walking, and the terrain can be uneven and potentially muddy depending on weather. If you have mobility concerns or prefer to stay on paved surfaces, you’ll want to read the detailed section below about what to expect at each stop.
This tour works best for travelers who want to see the Highlands without the hassle of driving, appreciate good storytelling and local knowledge, and don’t mind a bit of Scottish weather—or the occasional puddle.
- The Real Value Proposition
- Breaking Down the Itinerary: What You’ll Actually See
- Stop One: The Kelpies & The Helix (30 minutes)
- Stop Two: Balmaha and Loch Lomond (1 hour)
- Stop Three: Stirling (2.5 hours)
- Transportation and Logistics
- What Travelers Actually Say: The Honest Assessment
- Practical Considerations Before You Book
- Frequently Asked Questions
- The Bottom Line
- More 1-Day Tours in Edinburgh
- More Tours in Edinburgh
- More Tour Reviews in Edinburgh
The Real Value Proposition
 1 / 6
1 / 6 2 / 6
2 / 6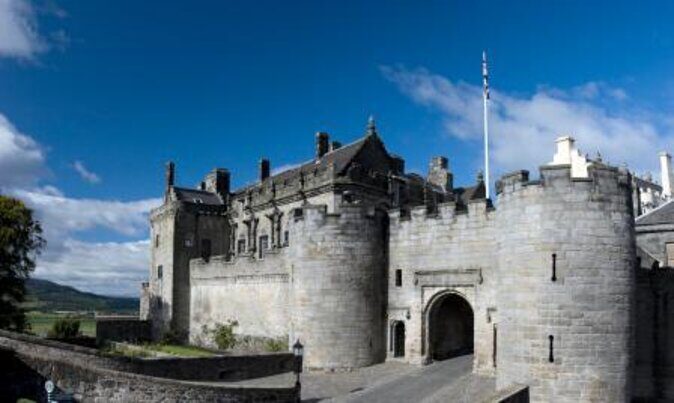 3 / 6
3 / 6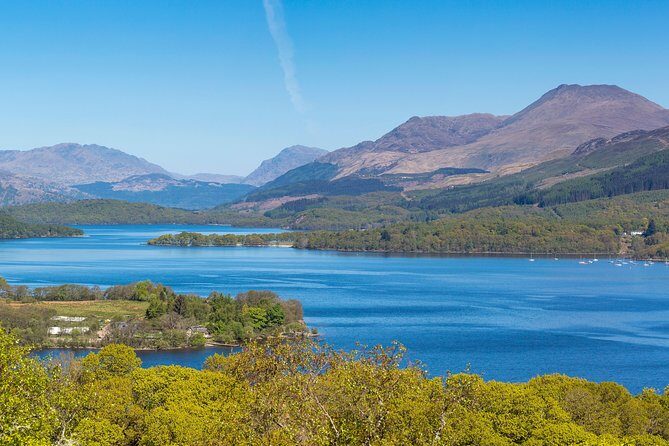 4 / 6
4 / 6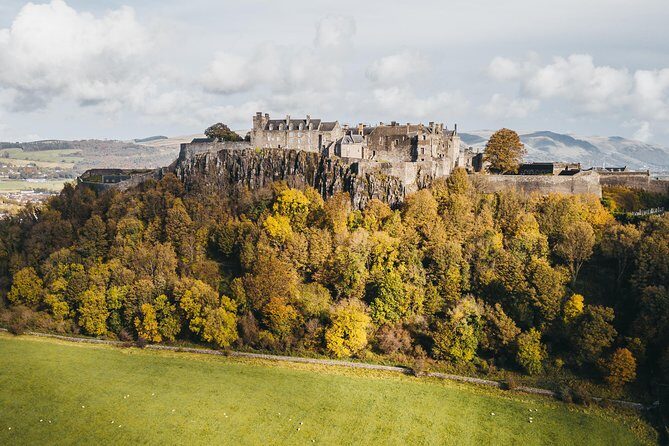 5 / 6
5 / 6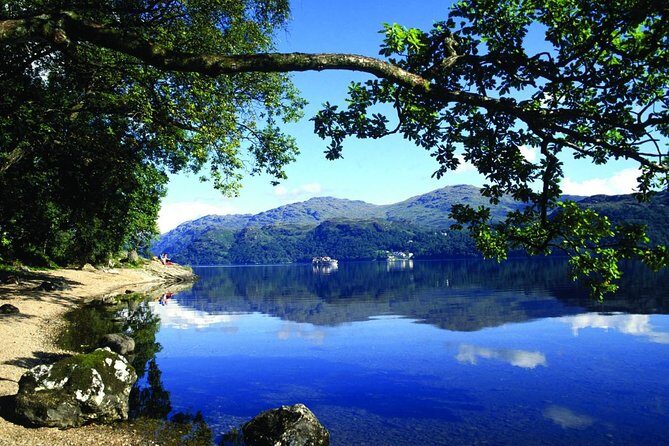 6 / 6
6 / 6At approximately 9 hours door-to-door, you’re looking at a full day out of Edinburgh, but you’re getting access to some genuinely spectacular scenery and history. The tour includes an air-conditioned coach and a guide—two things that make a significant difference when you’re exploring an unfamiliar region. You won’t need to worry about navigating narrow Highland roads, finding parking, or figuring out which direction to walk to see the best views.
The price point becomes meaningful when you consider what’s included and what isn’t. Stirling Castle admission (£17.50 per person) is optional, which is actually smart design—it lets budget-conscious travelers skip the castle and spend more time at Loch Lomond if they prefer, while those interested in Scottish royal history can add it on. Lunch isn’t included, which means you’ll either want to bring something or budget for food at the stops.
Breaking Down the Itinerary: What You’ll Actually See
You can also read our reviews of more tours and experiences in Edinburgh


Stop One: The Kelpies & The Helix (30 minutes)
Your day starts with a short drive from central Edinburgh to the Kelpies, and this is one of those stops that might sound quick on paper but delivers a genuine wow moment. These are the world’s largest equine sculptures—and we’re talking massive. Standing 30 meters high, they were designed by Scottish sculptor Andy Scott and celebrate both the horse-powered heritage of Central Scotland and the mythological water horses from Scottish folklore.
Travelers consistently mention the Kelpies as a highlight. One visitor called them “spectacular,” while another noted they’re “a fun photo stop.” The sculpture park at The Helix is free to visit, so you’re just paying for the stop itself in terms of time. If you’re not particularly interested in contemporary sculpture or art installations, this 30 minutes is something you could mentally skip or use as a brief stretch break. But if you appreciate modern public art or want dramatic photos for your travel album, the Kelpies deliver.
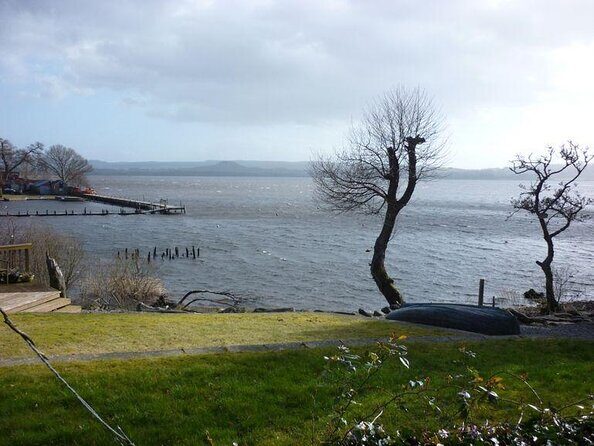
Stop Two: Balmaha and Loch Lomond (1 hour)
This is where the tour really shows you what makes the Scottish landscape special. Balmaha is a small village on the southern shore of Loch Lomond, and you’ll have roughly an hour to explore. The village itself is quiet and rural—there’s a café where you can grab coffee or a light snack, a small shop, a visitor center, and a memorial garden if you want to learn more about the area.
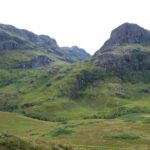
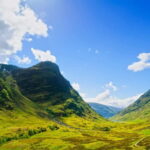
The main attraction, though, is the loch itself and the surrounding landscape. Ben Lomond rises dramatically across the water, and on clear days the views are genuinely stunning. Travelers describe it as “such a beautiful walk,” “so serene,” and “beautiful.” One visitor mentioned “misty views, seeing mountain peaks covered in mist with brown cut Scottish cows grazing in mountain skirts”—which perfectly captures the atmospheric quality of this place.
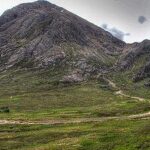
Your guide will outline a gentle walk along the loch shore via a well-maintained, clearly signposted path. This is a no-pressure walk; you can stroll as far as you like and turn back whenever you want. For those seeking more adventure, guides may also mention an optional hill walk to a scenic viewpoint that offers panoramic views of Loch Lomond and the Trossachs mountains beyond. One traveler who did this optional walk called it “adventurous” and “worth it,” though another found the path itself challenging due to uneven blocks and wet conditions.
This is where the “what to expect” conversation gets important. If you’re visiting in winter or after rain, surfaces will be wet and potentially slippery. Sensible walking shoes are essential, not optional. The hill walk, while optional, involves climbing roughly 500 feet on an uneven path, and it’s not maintained to the same standard as paved trails. The views from the top are genuinely impressive, but you need to be honest with yourself about your fitness level and comfort with uneven terrain.
A word of caution from one traveler’s experience: during winter months, this area can feel fairly quiet and some facilities may have limited hours. If you’re expecting a bustling loch-side village with multiple dining options, you might be disappointed. But if you’re seeking a genuine Scottish landscape and a moment of relative solitude, Balmaha delivers exactly that.
Stop Three: Stirling (2.5 hours)
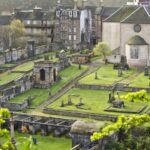
The afternoon portion of your day focuses on Stirling, a town that occupies a genuinely important place in Scottish history. Geographically, it’s positioned at a critical point in Scotland—it’s where the Lowlands meet the Highlands, and historically, this made it a strategic location for battles and power struggles.
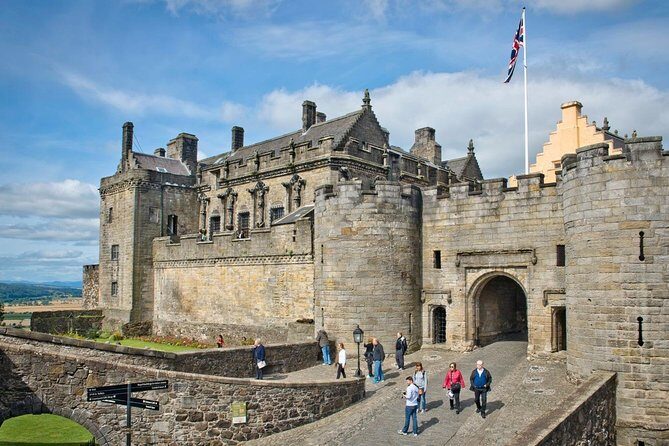
Stirling Castle is the main attraction here, and it’s optional—you can add the entrance fee (£17.50) if you want to explore the interior, or you can spend your time walking around the town itself, grabbing lunch, or simply enjoying the views from outside the castle walls. Multiple travelers who added the castle visit called it “magnificent,” “impressive,” and “amazing.” One person specifically mentioned enjoying the “Queens garden,” suggesting there’s plenty to see beyond just the stone walls.
The castle’s history is genuinely significant. Mary, Queen of Scots was crowned here. It was central to William Wallace’s fight during the Wars of Independence—the Battle of Stirling Bridge happened nearby. The Great Hall and James V’s Palace are highlighted as particularly spectacular rooms if you opt for the interior tour.
You have flexibility here that’s genuinely valuable. One traveler mentioned having “a nice meal and ale at Portocullis in Stirling,” suggesting you can grab decent food while you’re in town. Another recommended “taking the guided tour” of the castle interior, saying it’s “worth it.” The 2.5 hours gives you genuine time to explore, whether that’s the castle interior, the town itself, or a combination of both.
One important note: some travelers felt that the castle received disproportionate emphasis in the tour’s overall structure, with one noting that what they thought was a Loch Lomond and Trossachs tour ended up being heavily focused on Stirling. If your primary interest is spending maximum time at the loch and national park, you might want to skip the castle and request more time at Balmaha, or be prepared that the afternoon will be oriented toward Stirling.
Transportation and Logistics
You’ll be traveling in an air-conditioned coach with a maximum of 16 other travelers. The small group size is genuinely one of the tour’s strengths—you get actual personal attention from your guide rather than feeling like you’re on a cattle-car operation. One traveler specifically called out that “the small group made for a great day,” and others mentioned how their guides’ storytelling and knowledge made the experience better.
The coach itself is comfortable, though one traveler noted that “due to vehicle availability, there may be instances where this tour runs on a bigger bus.” This is worth knowing—if you’re specifically looking for the intimate small-group experience, you might want to confirm the vehicle size when you book.
You’ll meet at Highland Explorer Tours’ office at 60 High Street on the Royal Mile, and you need to arrive at least 15 minutes early for check-in. The tour operates in English, and your guide provides live commentary throughout the drive, which means you’re learning about the landscape and history as you travel, not just when you stop.
Return to Edinburgh happens by early evening, with the tour ending back at the Royal Mile meeting point. Travel times are approximate and subject to weather and road conditions—the company wisely advises that you allocate at least 3 hours after the scheduled return time for any onward travel plans.


What Travelers Actually Say: The Honest Assessment
With 626 reviews and a 4.8-star rating, you’re looking at genuinely strong feedback, though not perfect. The overwhelming majority of travelers (536 five-star reviews out of 626) loved this experience. The praise consistently focuses on three things: the guides’ knowledge and personality, the stunning landscapes, and the value for money.
One traveler summed it up nicely: “A wee bit of everything. Colossal Kelpies sculpture park, a delicious honeysuckle vanilla malt shop, a stroll along Loch Lomond, Brave Heart offerings, a castle featuring a wedding, Scottish tunes, a hip bus driver/guide. Great value!”
Another noted: “The guide gave us enough time to enjoy the three stops we made in the trip,” which speaks to the pacing being genuinely well-considered.
The criticisms that do appear tend to cluster around a few themes. Some travelers felt the time at Loch Lomond was too brief for what they wanted to do. One visitor suggested “more time should have been devoted to the national park” and recommended that the tour “drive through some of it,” rather than just stopping at Balmaha. Another wanted the tour to “build in more time at loch lomond” or “make that a lunch spot.”
There’s also the occasional comment that the guide’s dual role as driver and tour guide means “the driver cannot concentrate on landscapes and tell a story” effectively—though this is a minority view, and most travelers seem to find the guides manage both roles well.
One important reality check: a couple of travelers found the optional hill walk at Loch Lomond to be more challenging than expected, particularly in winter conditions. The path involves uneven stone blocks, can be slippery when wet, and lacks handrails or safety infrastructure. If you have any mobility concerns or prefer well-maintained paved paths, you should skip this optional walk and stick to the gentle shoreline stroll instead.
Practical Considerations Before You Book
What’s Included: Your guide, the air-conditioned coach, and access to all three stops. That’s genuinely good value.
What’s Not Included: Lunch, hotel pickup, food and drinks, and the Stirling Castle entrance fee. You’ll want to budget for lunch somewhere along the way—the stops have limited food options, so bringing a sandwich or planning to eat in Stirling makes sense.
Cancellation: You can cancel up to 24 hours in advance for a full refund, which is genuinely customer-friendly. Within 24 hours, you lose your money, so plan accordingly.
Physical Requirements: This tour involves walking, some of it on uneven terrain. The optional hill walk at Loch Lomond is genuinely challenging. If you have mobility limitations, stick to the gentle loch-shore walk and skip the hill. Bring proper walking shoes—trainers or hiking boots, not casual sneakers. Scottish weather is unpredictable, so rain gear is essential.
Best Time to Visit: Any season works, but be aware that winter brings shorter daylight hours and wetter conditions. The landscape is stunning year-round, though summer offers longer days and more stable weather.
Frequently Asked Questions
Q: How much time will I actually spend at Loch Lomond?
A: You have approximately one hour at Balmaha. This includes time for the gentle loch-side walk, visiting the café or shop, and exploring the village. It’s enough for a relaxed stroll and some photos, but if you’re hoping to spend the whole afternoon there, this tour might disappoint. One traveler specifically noted that 50 minutes at Loch Lomond meant “all we did was get a cup of coffee.”
Q: Is Stirling Castle worth the extra £17.50?
A: Multiple travelers who added the castle visit called it “magnificent” and “worth it,” specifically recommending the guided interior tour. If you’re interested in Scottish royal history or architecture, yes. If you’re budget-conscious or primarily interested in natural landscapes, you can skip it and explore the town instead.
Q: What if I’m not interested in the Kelpies sculpture?
A: One traveler noted that the Kelpies are “something you can easily skip to spend time somewhere else if sculpture or art isn’t your jam.” However, this is a fixed stop on the tour, so you can’t actually skip it—you’re just there for 30 minutes, and you don’t have to engage with the sculpture if you don’t want to.
Q: How physically demanding is this tour?
A: The gentle loch-side walk is manageable for most people. The optional hill walk involves climbing roughly 500 feet on uneven stone blocks and can be genuinely challenging, especially in wet conditions. If you have mobility concerns, stick to the gentle walk and skip the hill option.
Q: What should I bring?
A: Proper walking shoes (not casual sneakers), rain gear (Scottish weather is unpredictable), and a packed lunch or cash for food at the stops. The company specifically advises bringing sensible walking shoes because surfaces can be uneven.
Q: How large are the groups?
A: Maximum 16 travelers per coach, which is genuinely small by tour standards. This means you get actual personal attention from your guide.
Q: What if I arrive late?
A: The company cannot hold the bus or refund for late arrivals. You need to be there at least 15 minutes early for check-in.
Q: Can the tour pick me up from my hotel?
A: No, hotel pickup is not included. You need to get yourself to the meeting point at 60 High Street on the Royal Mile. The company recommends booking transport in advance.
Q: When will I return to Edinburgh?
A: Early evening, though exact times are approximate and subject to weather and road conditions. The company advises allowing at least 3 hours after the scheduled return time for any onward travel plans or connections.
Q: Is lunch included?
A: No. You’ll need to either bring a packed lunch or budget for food at the stops. Balmaha has a café, and Stirling has multiple restaurants, but options can be limited depending on when you visit.
Day Trip to Loch Lomond and Trossachs National Park with Optional Stirling Castle Tour from Edinburgh
The Bottom Line
This tour genuinely delivers on its promise to show you some of Scotland’s most compelling landscapes and historical sites without the hassle of driving yourself. The guides are knowledgeable and engaging, the small group size means you get actual attention, and the combination of the dramatic Kelpies sculptures, the serene beauty of Loch Lomond, and the historically significant Stirling Castle gives you a well-rounded taste of Scotland in a single day. The 96% recommendation rate from nearly 630 travelers speaks to real satisfaction.
That said, this isn’t perfect for everyone. If your primary interest is spending hours exploring Loch Lomond and the Trossachs National Park, you might feel the time allocation is too brief. If you have mobility concerns, the optional hill walk at Loch Lomond won’t work for you. And if you’re traveling on a tight budget, the castle entrance fee and lunch costs add up.
But for travelers who want expert-guided access to Highland landscapes, appreciate good storytelling and local knowledge, and are comfortable with Scottish weather and terrain, this represents genuinely strong value for a day trip from Edinburgh.