
If you’re going to chase the northern lights, this is built for photo-first travelers. In about 4 hours (roughly 7:45pm to around 11:30pm), you’re picked up from your Abisko hotel, given DSLR + tripod gear, and taught how to shoot aurora quickly.
Two things I really like about the setup: the small group limit (max 8) and the multiple pursuit styles. Depending on conditions, you may be on foot near Abisko National Park, in a 4×4 van, or in a sleigh-style ride behind a snowmobile—so you’re not stuck doing just one thing all night.
One drawback to consider: aurora viewing isn’t guaranteed. If skies are poor, you can end up waiting a long time for faint color—or nothing at all. The good news is you still get real instruction and time outside, not just a quick photo stop.
This tour is best for couples, friends, and solo travelers who want help getting better aurora shots without renting a bunch of gear or figuring it out alone.
- Key Points
- Where Abisko earns its aurora reputation
- The practical booking basics: duration, timing, and transfers
- What’s included (and what you still need to bring)
- The vibe: small group guidance, big focus on getting the shot
- Your itinerary night by night (what the structure really means)
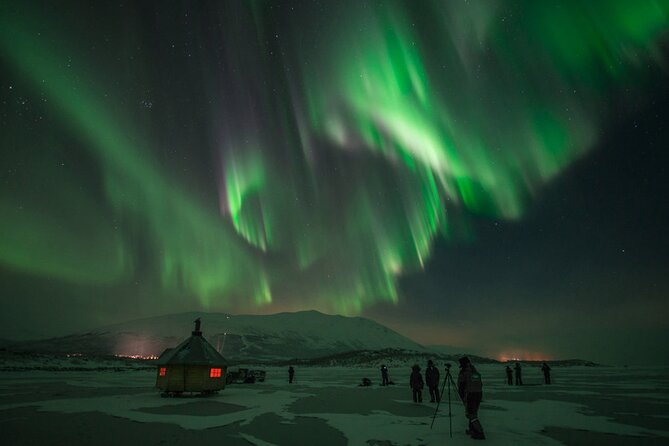
- Stop 1: Abisko National Park area (your base for chasing and shooting)
- When you’ll actually get the hot drinks and snacks
- The photography part: what you’re learning (and why it helps)
- Transportation, darkness, and comfort: the real Arctic logistics
- Group size: the difference between “help” and “crowd”
- The value question: is it worth 3.07?
- What reviews point to (the good and the “watch out”)
- Tips to make your night better
- Should you book it? My balanced recommendation
- FAQ
- What time does the tour start?
- How long is the tour?
- Is pickup included?
- What’s the meeting point?
- Are cameras provided?
- What warm items and refreshments are included?
- Do I need to bring an SD card?
- Is cancellation free?
- Is the northern lights viewing guaranteed?
Key Points
 1 / 9
1 / 9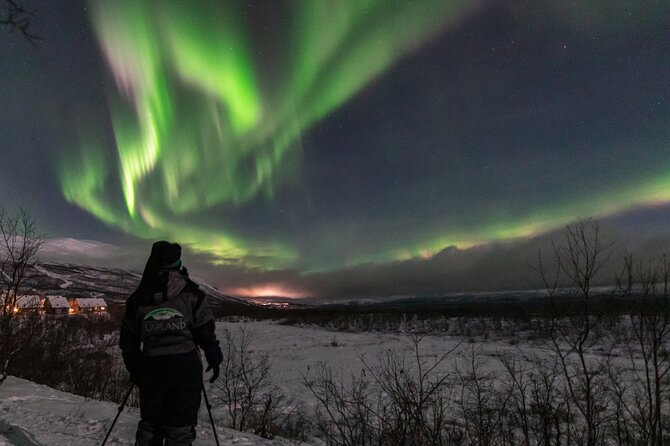 2 / 9
2 / 9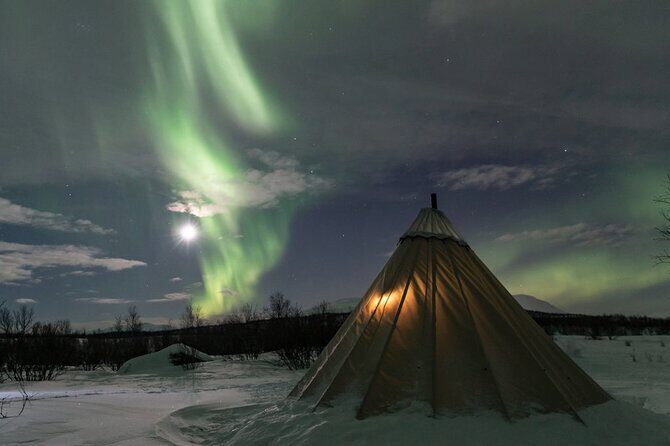 3 / 9
3 / 9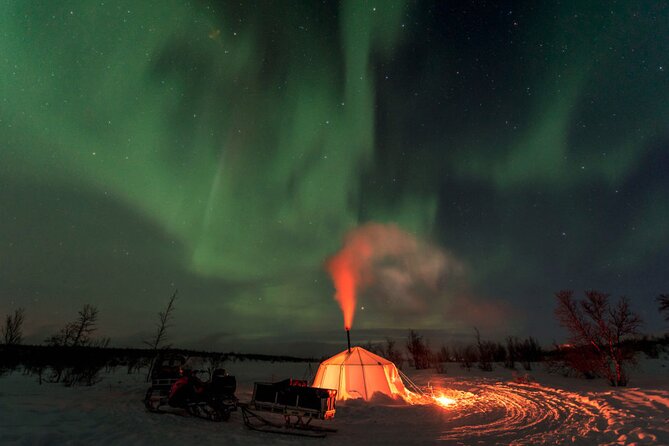 4 / 9
4 / 9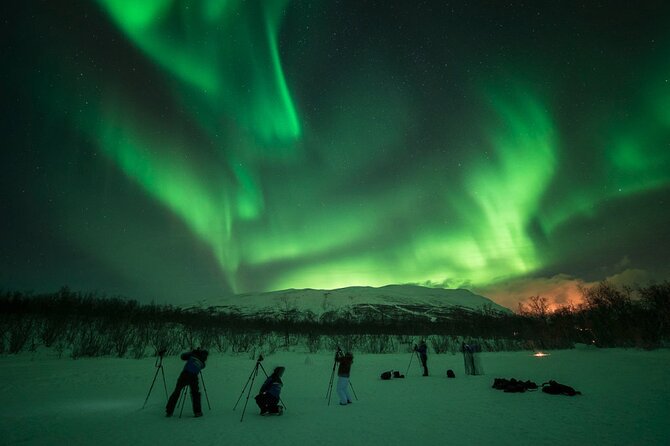 5 / 9
5 / 9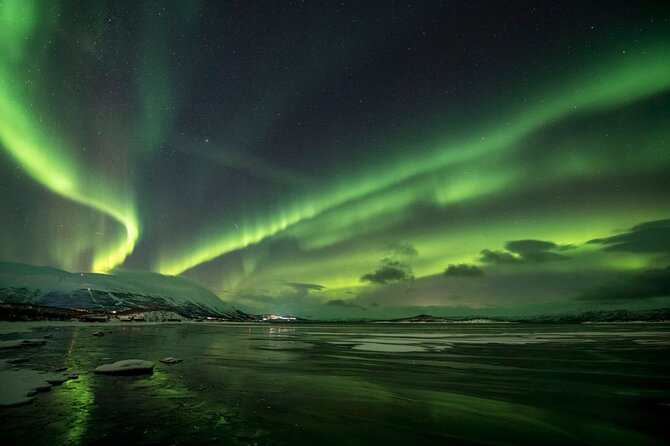 6 / 9
6 / 9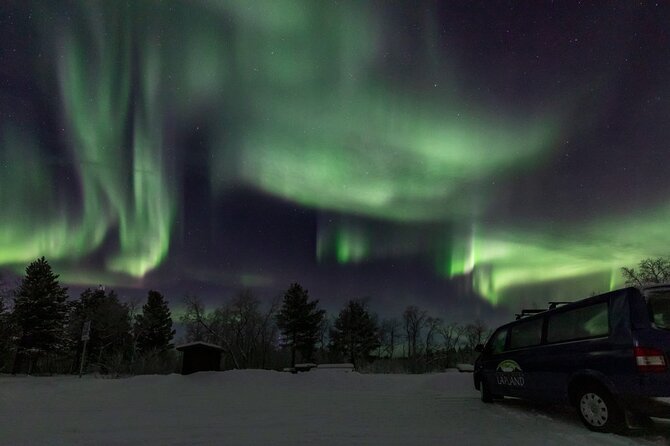 7 / 9
7 / 9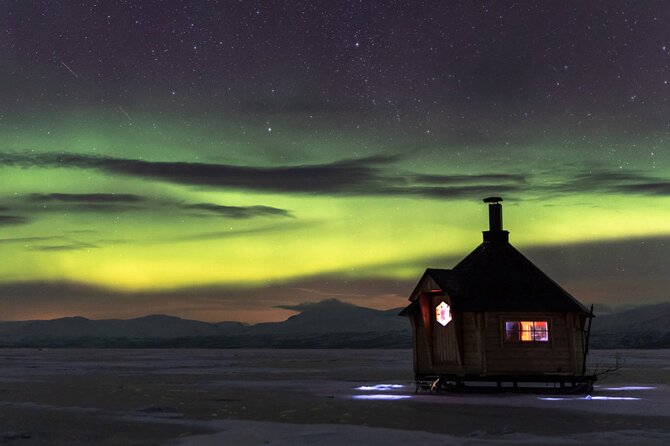 8 / 9
8 / 9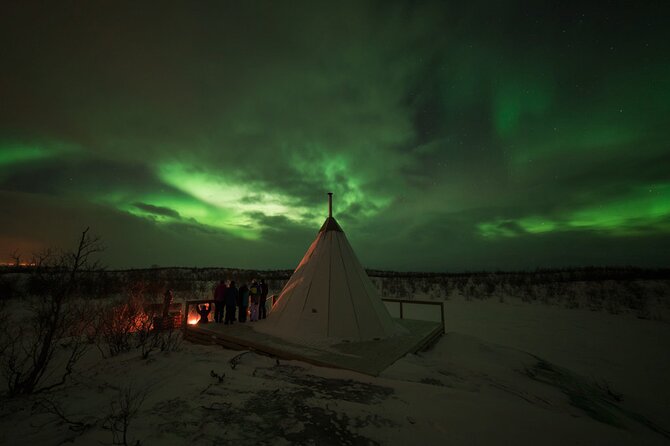 9 / 9
9 / 9- Small group size: capped at 8 travelers, which usually makes the guidance feel personal.
- Photo gear included: DSLR camera, tripod, and extras like warm overalls and a headlamp.
- Three ways to chase auroras: on foot, by 4×4 van, or by sleigh to a wilderness camp.
- Warm-up breaks: hot drinks and snacks are included, though timing can vary.
- Pickup included: round-trip transfers from Abisko and Björkliden hotels.
- Aurora depends on weather: you’re paying for a hunt and instruction, not a lights guarantee.
Where Abisko earns its aurora reputation
Abisko National Park sits in one of Europe’s best-known aurora zones. The big reason travelers pick it is the chance of clearer skies compared to many other places. On this tour, the plan is simple: use local conditions, then adjust the route when the sky doesn’t cooperate.
You’ll start in Abisko at the STF Abisko Turiststation area (meeting point). From there, you’re guided into the night with the expectation that you’ll be chasing the lights—literally and photographically.
The practical booking basics: duration, timing, and transfers
The tour runs about 4 hours. The start time is 7:45pm, and return is listed as earliest 11:30pm (later if aurora activity is happening).
Transfers are part of the deal:
- All hotels in Abisko: pickup about 7:30–7:45pm (be in the lobby by 7:30pm)
- All hotels in Björkliden: pickup at 7:15pm
- It’s round-trip with no extra charge, and it ends back at the meeting point.
This matters because aurora hunting is hard on timing. The worst-case scenario is missing the best sky window. With pickup handled, you spend your energy on your camera instead of logistics.
What’s included (and what you still need to bring)
You get a real kit, plus comfort items that make the cold more manageable:
Included:
- Coffee and/or tea
- Hot lingonberry juice
- Snacks
- Camera rental (DSLR) and tripod
- Backpack, warm overalls, and head lamp
Not included:
- SD memory cards
- The tour notes you should bring or buy an SD card (a minimum of 4 GB is recommended). Memory cards are available for purchase (listed: 32 GB for 250 SEK).
- Heavy-duty arctic boots aren’t included as standard rental. They’re available to rent during the tour.
A small but important tip: even if you’re using the provided camera, you’re still responsible for storage. One traveler specifically warned about bringing an SD card, and that’s the kind of hassle you’d rather avoid.
The vibe: small group guidance, big focus on getting the shot
This is capped at 8 travelers, and that shows in the way the night is run. With smaller groups, guides can correct settings faster, check your framing, and keep you from feeling lost while everyone else shoots.
You also get a quick skills primer before you’re really out there working the sky. That helps a lot because aurora photography is mostly about getting your basics right in the cold: camera settings, tripod stability, and how to stay patient when the lights don’t show up instantly.
Your itinerary night by night (what the structure really means)
This tour is built around one main location: Parc Nacional d’Abisko. But the “how” changes—because the sky changes.
Stop 1: Abisko National Park area (your base for chasing and shooting)
You’ll start near the STF Abisko Turiststation meeting point, then move through the hunt based on weather and aurora forecasts. The plan is flexible and fits how northern lights travel should work: you look, you wait, you move when needed.
Here’s what “three ways to see” means in practice:
1) On foot near a nearby teepee
If conditions are decent, you may be taken to a nearby teepee area. This is the most “hands-on” option for photographers because you’re close to the action and not spending time in transit.
The upside: you can settle in and work your camera settings without bouncing around.
The tradeoff: if cloud cover rolls in, you may end up waiting longer in one general area.
2) In a modern 4×4 van
If the aurora forecast suggests better chances elsewhere, you may be loaded into a 4×4 van and driven to a spot where the sky looks better.
The upside: you can respond quickly to cloud patterns.
The tradeoff: you’ll spend a bit more time traveling, and the camera setup rhythm can feel more “stop-start.”
3) Sleigh ride behind a snowmobile to a wilderness camp
This is the most cinematic option. You’re taken to a darker wilderness spot where the aurora has room to show, with the added fun of the cozy sleigh style ride.
The upside: darkness and atmosphere tend to improve the odds of dramatic visuals.
The tradeoff: you still need to tolerate the cold while waiting for the lights. Bring your best patience.
When you’ll actually get the hot drinks and snacks
Hot drinks and snacks are included, and many travelers mention warming up around the fire. Still, one less-satisfied guest felt the drinks/snacks were only offered briefly near the end rather than throughout the night.
So think of it like this: you’re guaranteed hot drinks and snacks as part of the experience, but the timing may not match your ideal “constant warmth.” Plan to rely on your warm overalls and headlamp, not just the refreshment schedule.
The photography part: what you’re learning (and why it helps)
This tour is designed for aurora photography with a DSLR and tripod—meaning you’ll stop treating the camera like a point-and-shoot.
You’re provided equipment that’s preset for northern lights, then guided through basic skills for finding and photographing the aurora. That preset matters because it cuts down the “first 20 minutes of fiddling” time. In aurora hunting, those minutes can be the difference between capturing a brief glow and watching it vanish.
What I found useful about guided aurora photo sessions is that you don’t just get “settings.” You get help staying steady and consistent:
- keeping your tripod solid in snow
- setting up quickly so you’re not missing the moment the sky shifts
- learning what to tweak when the aurora is faint or fast-moving
And if the lights don’t arrive right away, you’re not totally stuck. Some travelers reported making fun photos like light painting while waiting—so you still leave with images, not just memories.
Transportation, darkness, and comfort: the real Arctic logistics
This is where small details matter. You’ll be outside at night in and around Abisko National Park, with the cold pressing in as soon as you pause.
You’re given:
- warm overalls
- a head lamp
- a backpack for your gear
Those items make the difference between “this is manageable” and “I’m freezing and fumbling.” One traveler mentioned how guides helped take care of warming needs around the fire and tended to the group’s comfort. That kind of attention is what you want when your fingers are already working the tripod.
Also, note this: the tour is described as near public transportation. That’s a nice backup, but with pickup and round-trip transfer included, you probably won’t need it.
Group size: the difference between “help” and “crowd”
Small group limit is one of the big selling points here, and many travelers mention it positively. The tour is capped at 8, and that’s the sweet spot for aurora photography help.
But I’ll be straight with you: one unhappy guest said they experienced a larger group than expected (about 15 people). That suggests that occasionally, circumstances could affect how the night is run. It’s still worth booking if you care about instruction and gear—but go in knowing no one can control cloud cover, and logistics can sometimes flex.
If you value individual coaching, small group is your best bet. If you’re not that camera-focused, you might find a cheaper DIY night out feels more like “the same thing.” (More on that below.)
The value question: is it worth $183.07?
At $183.07 per person for about 4 hours, you’re paying for three things:
1) Guided scouting and decision-making across different chase modes
2) Photo setup help (DSLR + tripod + quick skills guidance)
3) Comfort extras (hot drinks, snacks, warm overalls, headlamp)
If you already own high-quality astro gear, you might feel the rental and instruction cost more than you expected. One traveler even said they got better pictures staying on their own.
But if you don’t want to wrestle with camera settings in the cold, this tour can be great value—because the hard part isn’t just seeing auroras. It’s translating what your eyes see into a camera file you’ll actually like later.
Also, compare “cost per good result.” A solo outing might be cheaper, but it can cost you hours and still leave you with weak shots. Here, at least, you get structured instruction and the right tools.
What reviews point to (the good and the “watch out”)
Overall rating is 4.9 with a strong recommendation rate, which is a good signal for traveler satisfaction.
Good signals you’ll likely feel:
- Guides are described as knowledgeable and enthusiastic
- People mention being helped with camera setup and getting solid aurora photos
- The sleigh/wilderness camp vibe gets called out as a standout experience
Common “heads-up” themes:
- Weather can crush results. You might see muted greens or nothing.
- Group size expectations can be a real issue for some travelers if it feels larger than promised.
- Hot drinks/snacks timing may not feel like “warmth all night.” Some felt it was only late.
My practical take: treat this as a guided aurora photo workshop + hunt, not a guaranteed show.
Tips to make your night better
A few things that will help you have a smoother experience, especially if the aurora is shy:
- Bring your SD card (or be ready to buy one). Don’t gamble on storage.
- Wear layers under the warm overalls if you run cold.
- Keep your camera ready. When the aurora appears, it often moves quickly.
- Expect waiting. Even on a “hunt,” you’ll spend time checking the sky and tweaking settings.
- Stay flexible mentally. One traveler had fun even without auroras, using the time creatively.
Should you book it? My balanced recommendation
Book this tour if:
- you want DSLR-based aurora photography help
- you like the idea of small group guidance (max 8)
- you want pickup + gear + warmth handled for you
- you’re okay paying for instruction even if the sky is moody
Skip it (or reconsider) if:
- you mainly want aurora visuals and don’t care about photography settings
- you strongly dislike structured waiting and prefer total freedom
- you’re hoping for a “guaranteed lights show” (no aurora tour can promise that)
If you want a realistic win, go in focused on learning and capturing what you can. Even when the lights are faint, the guide-led setup can still produce photos you’ll be proud to share.
The Ultimate Aurora Photo Adventure
FAQ
What time does the tour start?
It starts at 7:45pm.
How long is the tour?
It runs for about 4 hours (return is earliest 11:30pm, and may be later depending on aurora activity).
Is pickup included?
Yes. Round-trip transfer is included from hotels in Abisko and Björkliden.
What’s the meeting point?
The meeting point is STF Abisko Turiststation, Abisko, Sweden, and the tour ends back at the meeting point.
Are cameras provided?
Yes. The tour includes rental of a DSLR camera, plus a tripod.
What warm items and refreshments are included?
You’ll get coffee and/or tea, hot lingonberry juice, and snacks, plus warm overalls and a head lamp.
Do I need to bring an SD card?
Yes, you should bring an SD memory card. The tour recommends at least 4 GB of storage, and memory cards are available for purchase during the tour.
Is cancellation free?
Yes. You can cancel up to 24 hours in advance for a full refund, and any weather cancellation should result in a different date or a full refund.
Is the northern lights viewing guaranteed?
No. The experience requires good weather, and aurora visibility can’t be guaranteed.